How to prepare a conker
There are four key things you need to prepare a conker ready for battle, these are:
1) Choose what type of conker you want to play with (i.e. whether you want to harden your conker or play au naturale)
2) Hole your conker safely
3) String your conker
4) Practice your conker moves
How to harden your conker
Hardening conkers is part art / part science. The classic way of hardening a conker is to use a mix of vinegar and baking. That said, our preferred conker hardening technique is to naturally age a conker - as by naturally ageing a conker the nut retains its natural oils - giving it added strength - whilst losing its water content, the bit that hardens it.
Other more extreme ways of hardening your conker is to inject it with glue or even concrete! If you want to learn more about how to harden a conker, we’ve written up a whole guide to conker hardening here >>

Selecting the right conker - is bigger better?
If you don’t want to go down the conker hardening route, then the other option you have is to make sure you pick the right type of conker that will win you a game.
It’s definitely not the case with conkers that ‘bigger is better’. In fact, often smaller is better. The two reasons for this are 1) Smaller conkers are more difficult to hit, so if you’ve got a tiddler then it’s likely your opponent will struggle to hit yours! 2) Smaller conkers can be stronger, as the compact size means these less opportunity for the conker to break / weaken at any point.
How to hole a conker
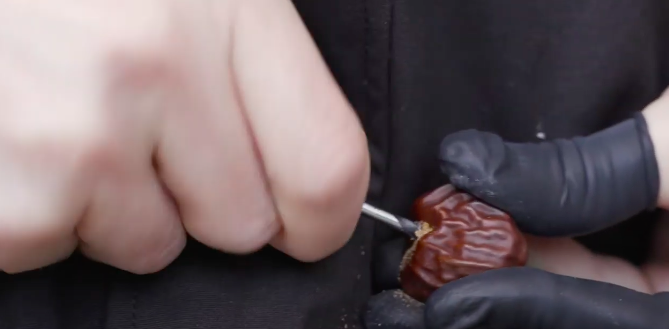
Making a hole in your conker is harder (and more dangerous!) than you might think. The first consideration is what tool’s best to use to hole your conker. And linked to this, you also need to think about which is the safest way to hole a conker.
The quick answer to the best way of holing a conker is to us a ‘drill’ type of device - rather than trying to punch a hole in your conker, using for example a kitchen skewer or nail (two of the most popular and dangerous approaches to holing a conker!).
The reason why we recommend using a drill - ideally a hand drill - is that this is the safest way to make a hole in a conker, as by drilling you’re a lot more in control and less likely to skewer your hand. Also, by drilling your conker, you’re less likely to damage the integrity of the conker and therefore keep it strong - and giving it the best chance of winning!
We’ve written up a whole guide to the best ways to make a hole in a conker here >>
How to make a hole in a conker
How to string a conker
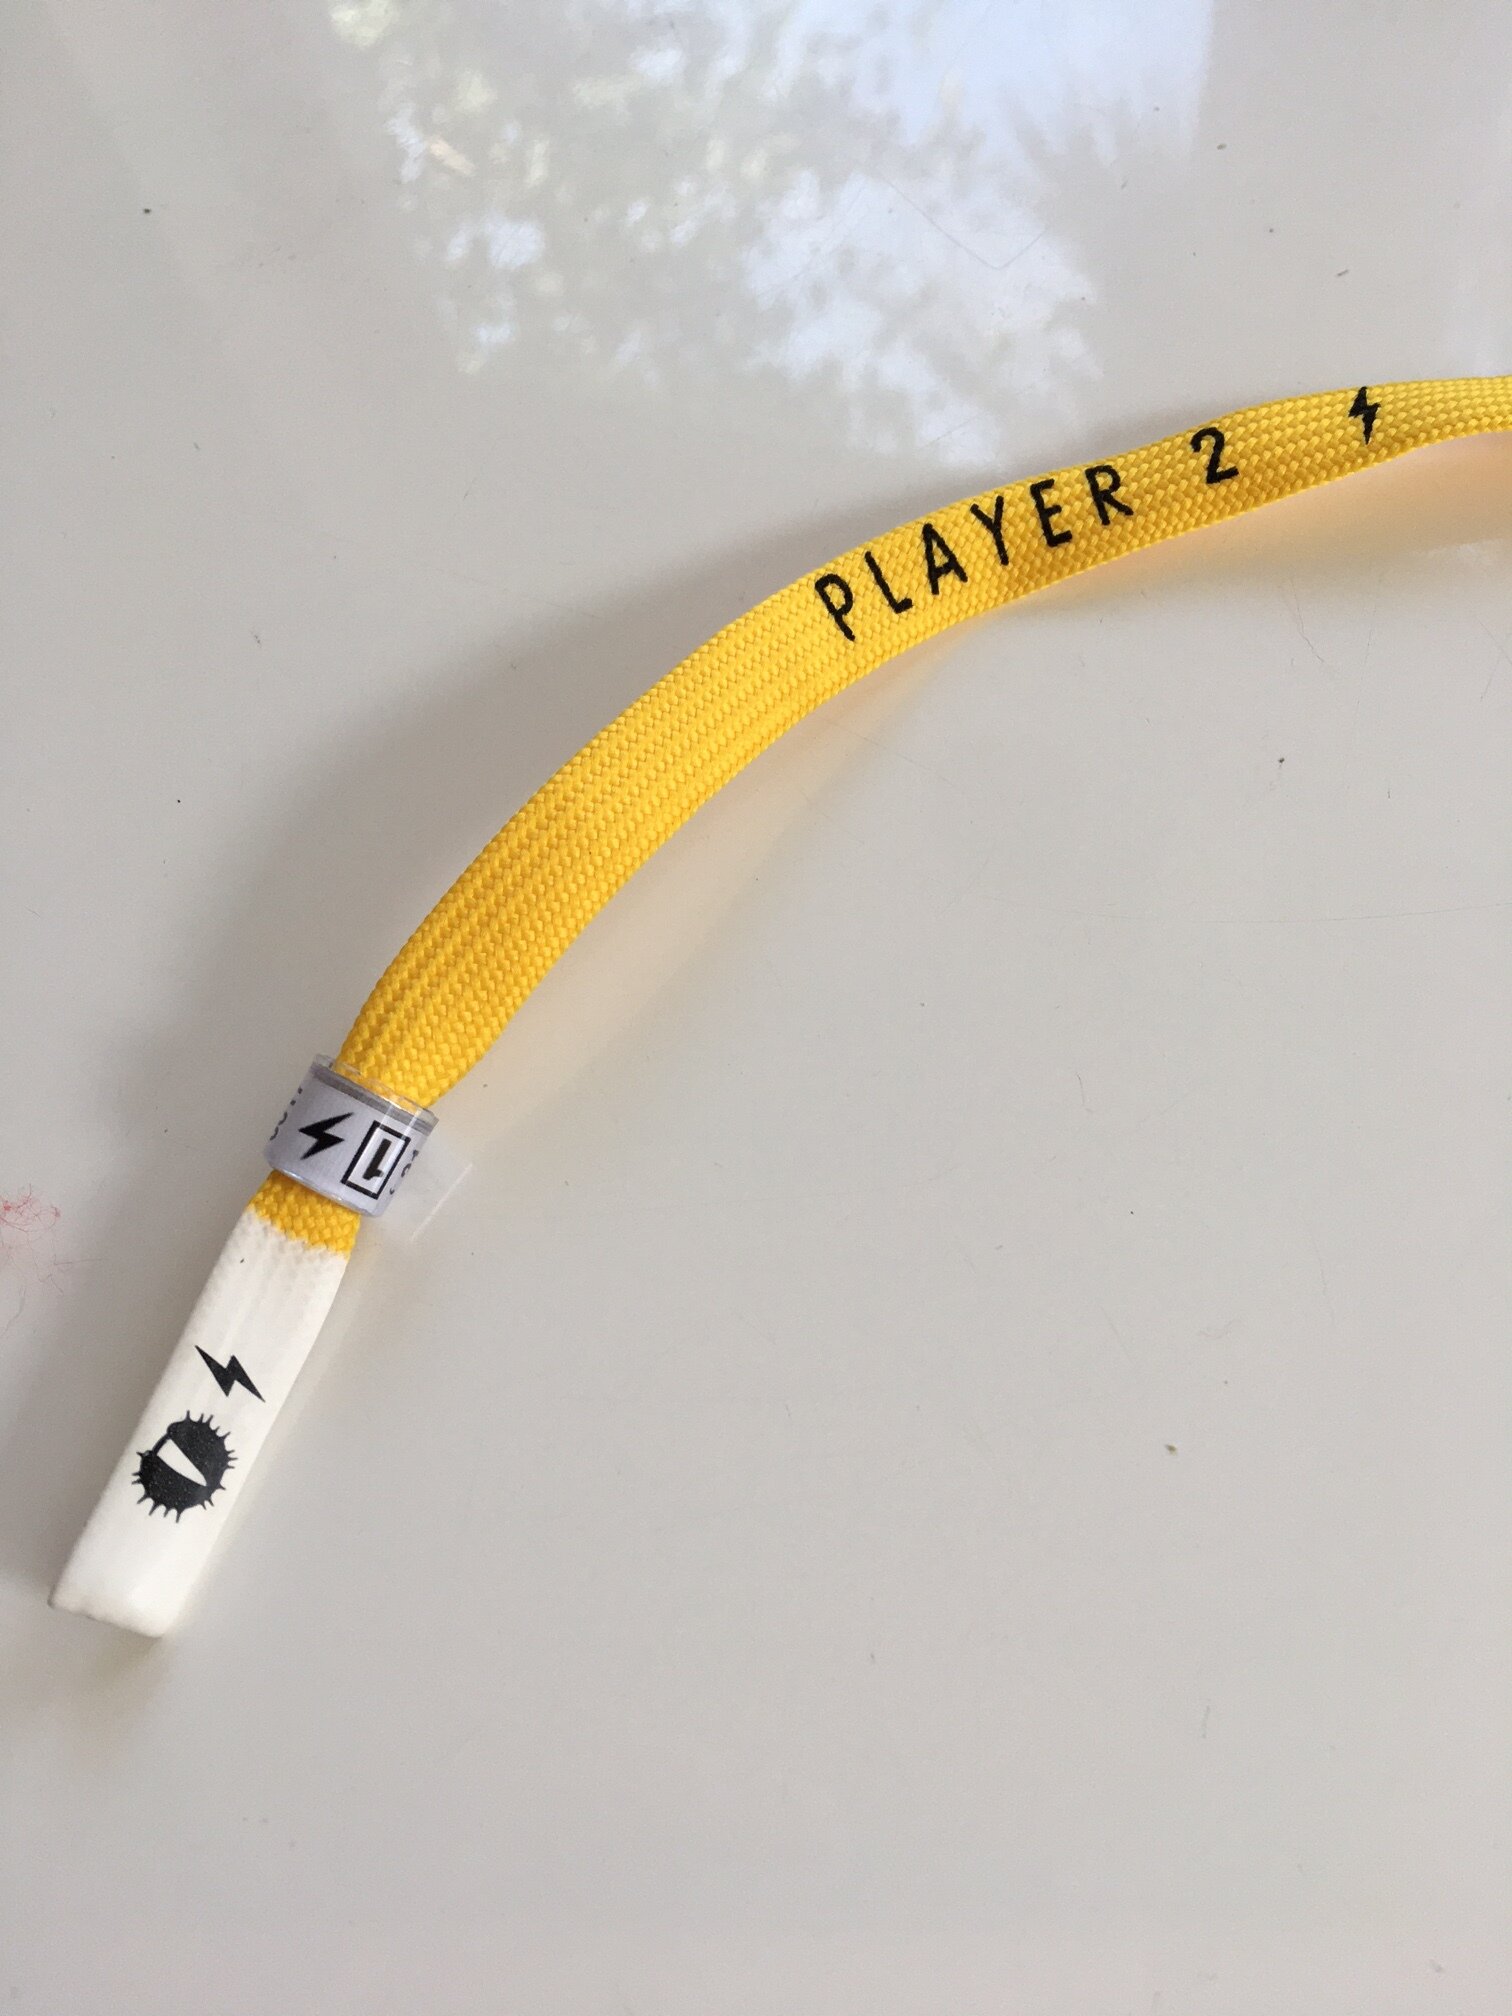
The basics of threading a conker with string are very simple, first you need to make a hole through the centre of your conker (as per the instructions above), then you need to thread the conker through the hole. Threading the conker is a bit more difficult, as you need to make sure you’ve made the hole in your conker wide enough to take the string / thread; you also need to make sure that the string your using has a firm enough end to be pushed through the hole - as if your string is frayed at the end it won’t easily go through the hole (this a classic problem, and can be really annoying when you’re preparing your conker). The final task is to knot the end of your string. The key thing to get right here is to make sure that the knot you make is big / robust enough, so that it doesn’t slip through the hole of the conker - meaning your conker will fall to the ground (and be stamped on!).
What length of string to use on a conker
The optimal length for a conker string is c.60cm. This length will give you enough length to knot the end, and also enough to hold onto - and importantly wrap around your hand, so it’s nice and firm - and you don’t drop the conker mid-battle!
Best type of string to use to thread a conker
When choosing the type of string to use to thread your conker you should really consider whether you want to ‘go pro’ or take an amateur approach. Amateurs will use something like a shoelace or garden twine. Both of these are sufficient but not optimal. If you’re taking more of a professional approach to playing conkers, then we’d recommend opting for something like bungee cord (for added power) or kevlar thread (for added strength).
Shoelace: using a shoelace is the classic schoolboy approach to stringing a conker - however it’s not an approach we’d broadly recommend. The positives of using shoelaces to string your conker are that they’re a) pretty strong b) they usually have a prepared pointy end, meaning you can easily thread it through the conker (which can often be a struggle!) c) they’re freely available (especially if you nick a shoelace from a mate’s pair of shoes). The negatives of using shoelaces are mostly to do with the amateur nature of your conker prep, as really you should be stringing your conker with pride - not nicking a mate’s shoelace. Of course a negative is also the fact that it leaves you a shoe short of shoelaces - which could be quite annoying!
Garden twine: using garden twine as your conker string is very much an organic / bucolic-type of approach. However, the main downside to garden twine is that it’s not the strongest, and has a tendency to break quite easily. It’s also very difficult to thread a conker using garden twine, as the ends of the twine fray meaning it’s difficult to push through the conker’s hole.
Kitchen string: using kitchen string for your conkers is similar to using garden twine, and suffer from both the two downsides. Kitchen string is slightly stronger than garden twine, but you will similarly find that the string is fairly weak and will break easily. Also, because kitchen string is very fine, you’ll find that there are x2 extra downsides 1) The string will cut through your hand when you play hurting you (especially if you play for a while) 2) Because the string is so fine, you’ll find it hard to create a big enough knot - and so your string is likely to slip through the hole of the conker. A tip here is to triple-knot the string, so you make a big enough knot.
Leather lace: leather lace is very much the luxury approach to conker string. Because of the firmness of the leather, it makes it very easy to push the lace through the conker. The main downside of leather lace is that although strong, the leather can wear and weaken after a few games - so it doesn’t have the longevity of other types of string. That said, it is very strong initially - so if you’re happy to change your string between games it should last.
Bungee cord: for the professional conker player, using a bespoke bungee cord is the perfect choice. The elasticity of the cord gives it a real power and snap - enabling you to get x3 the amount of power you’d get from a normal string. The downside of this extra power and elasticity is that you have to practice using the cord, as it’s not the easiest to play with - largely because the cord extends as you hit the opponent’s conker, which makes it difficult to judge how to aim / hit accurately.
Kevlar cord: having your conker cord break is a problem with *most* string options. Not with kevlar cord. Using kevlar avoids this issue, as kevlar is one of the strongest materials in the world - so it’s highly unlikely that your cord will break or be snapped by an opponent.
Special string for conkers - developed by Peckham Conker Club
Prepping like a professional
If you want to take your conker preparation to another level, we’d suggest watching the following video we made, which gives an insight into the lengths some go to in prepping for a game of conkers ;-)